First of all, sorry it’s been a while since my last post. More articles to come in 2016!
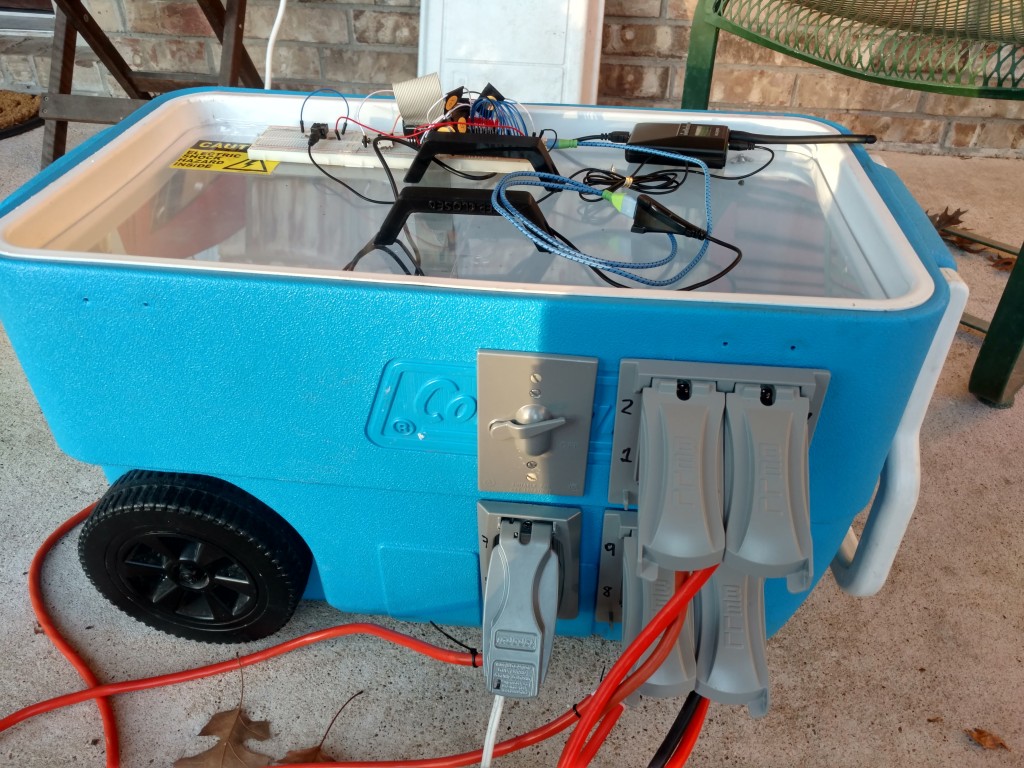
Since then, I did manage to take the Magic Cooler and use it to run the Christmas lights on my house with some minor upgrades to the software and minor updates in the cooler. If you’re not already familiar with the Magic Cooler, see it explained in Part1 and Part2 from previous posts.
My daughter painted the sign showing what FM frequency to tune to to listen in (it was later changed to 88.3MHz since many tuners can’t handle ‘even’ frequencies). My son helped code up some of the songs.
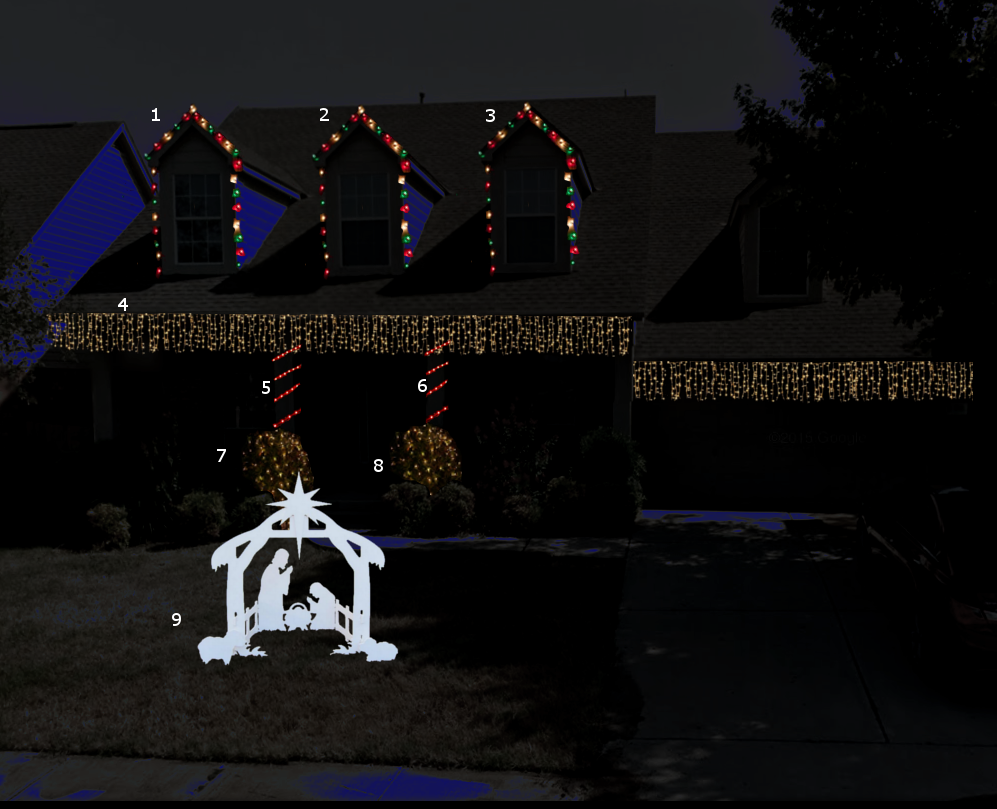
The house was hooked up with 9 separate sets of lights. The nativity scene was the only one kept constant, the other 8 would be controlled by the music playing.
Each note in the song is assigned to one or more of the relays that controls one of the light sections. This way synchronizing the music to the lights is much easier than the usual manual method of associating beats to music, although this method does require coding up each song manually. A side benefit is that you can involve those more familiar with reading music than C code to add new songs to the ‘mix’. More on the music-to-code methodology in another article (maybe I’ll make my first Instructable!).
The music is output to an FM transmitter instead of a speaker, so as to not bother the neighbors and to permit those driving by to listen to the music on their car radios.
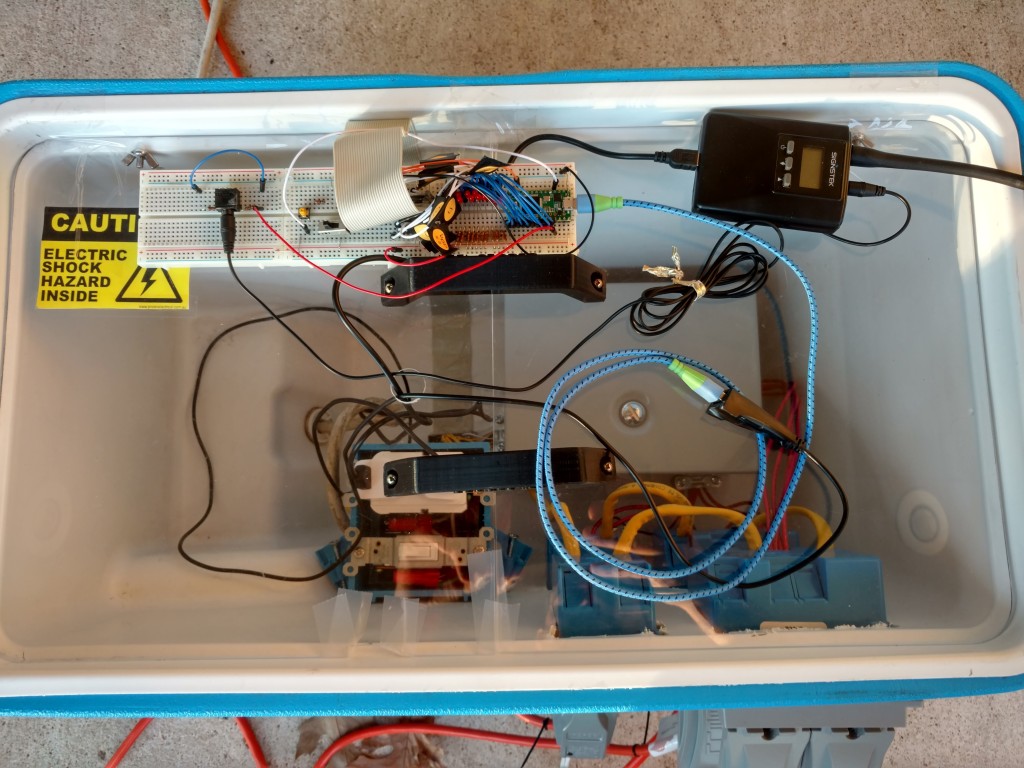
Minor updates I did to the cooler in the pic above include:
- Add an IDE ribbon cable to connect from the control signals at the bottom of the box up to the prototyping platform on top. These are connected to the middle breadboard, as to permit connecting any microcontroller board in the future if desired.
- Switch added to go between Play and Test modes.
- Momentary pushbutton (yellow) added to help test out the relays and various light connections. Repeatedly pushing thus button goes from all off, turns on relays one a time, then turns them all on (no relays actually activate when all are told to turn on due to current limitations of the system).
- Extension USB cable added for USB hooked to Teensy control board to permit easy reprogramming of the board. Hope to upgrade in the future to permit wireless reprogramming or control of the board (as a side benefit I did figure out how to reprogram using Arduino IDE on my Chromebook using Crouton OS– very neat and portable!).
Updates I’d like to do:
- Make PCB for the relatively constant parts of the control system– LED indicator lights, audio output, pushbutton and DIP switches.
- Upgrade to solid state relays to permit more relays to be on at once.
- Add LED to indicate which song is playing at the moment.
- Add USB hub for easier 5V power distribution on prototyping platform.
- Code updates to permit even completely automatic note-relay assignment.
- Add WAV playing capability of each note so that it sounds better.
- Add capability to play 4 part harmony type music (will sound better).
- Make software library to make code easier to manage online, allow users to submit songs remotely.
Let me know if you have any other suggestions by giving a comment!
Merry Christmas!!


